This project is to brew drinkable (and hopefully tasty) beer for the Knowlden family, and any lucky (or unlucky) friends.
Next actions:
A fair amount of work has been done so far. I will briefly document it:
Next actions:
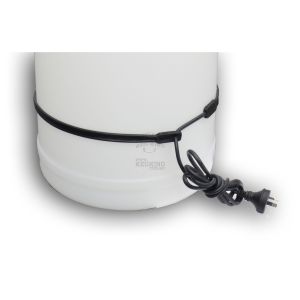
The new heating belt has arrived, ready for us to begin the second brew this evening. The current throughts around the bottle conditioning are that the heat should be increased, possibly thrugh the use of wire-wound resistors. These look cheap at around $1 for 15 W. It's challenging to think of cheap and simple solutions, but I think this represents good value for money. Also, a new sensing technique should be used for the temperature: currently, the relatively expensive digital BMP085 is being used, but perhaps an analog counterpart might be cheaper, just as accurate, and require less wires to hook up. Even in conjunction with an om amp of some kind, this may present better value.
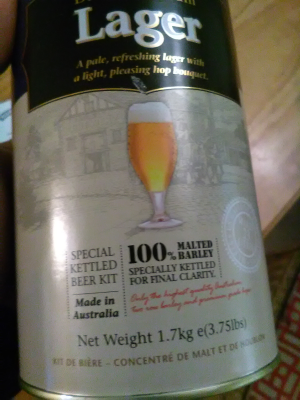
The beer was brewed in the same way as the first at 2017-08-09. The only difference was that the bottom of the can was scraped for extra syrup. The resulting FG was 1040 g/L. It has been left to ferment.
Another batch of beer bottled this evening at around 18:00. Final FG was 2012, again. Lots of beer in the carbonation process now. The older bottles seem to have cleared up a bit, which is interesting. The job remains to clean the carboy again. Then, we need to start thinking about the next product.
I also had some thoughts on the new bottle conditioning system, perhaps using 60 or so 2 W 6.8 Ohm resistors in series/parallel, and supplying them with 12 V from an adapter. This will cost around $25 total I would estimate. I have bought some example resistors to try it with, as well as a 12 V 5A power adapter and the jack to go with it.
Next actions:
The beers were removed from the conditioner yesterday, and 3 were placed in the fridge. I was playing around with the proof of concept for the new heating system since a few of the electrical components arrived, including the power supply, DC jack, and the resistors. 5 x 6.8 Ohm resistors in series with a 12 V power supply theoretically would have dissipated roughly 1 W each, and they were very hot to the touch in steady state, around 62 C according to my thermocouple. According to this website, of MDF, "1050 days at 225° F (107° C): 10 percent loss in weight and slight discoloration." In which case, 62 C steady state should be fine. And this would be a worst case anyway, thanks to the duty cycle of the temperature controller. I think I know enough to design a build a the electrical components required for the carbonation chamber now, so all that is needed is the mechanical design.
Next actions:
The beer was tasted for the first time: it tastes pretty good! the flavour across the batches was probably consistent (11/18 guesses correct for a "same or different?" blind test with 3 subjects), so the brewing technique might be acceptable. The next action was chosen: for the time being, continue to brew beer using the cheap and easy kits, try varying the fermentation temperature, and see if spending longer in the primary fermenter improves the beer clarity.
Next actions:
The equipment was cleaned yesterday, and the beer brewed today. This time, it is Coopers IPA, with 1.5 kg of light dry malt (BrewMart). The starting FG was a little high at 1054, compared to the expected 1046-1048 on the packet. This could be quite a strong brew. We have decided to brew at 22 degrees C this time, and to leave it in the primary fermenter for 2 weeks, as per our decisions on the 2017-08-29.
A friend has produced a couple of potential designs for the beer label itself, which we quite like (but I won't reveal them on this website just yet for IP reasons). Now we will take steps to produce labels for the bottles, as well as the cartons. Another friend has kindly donated several hundred clear glass 330 mL bottles for us to use. these will be sent through the dishwasher and then sanitised before bottling.
The new bottle conditioner should be designed as a matter of haste to allow bottling in 2 weeks. The design, as it stands, is to use roughly 50 W of heating from the DC transformer, switched by an electronic Arduino thermostat, powering a mesh of 6.8 Ohm resistors. The design is cheap, safe, and hopefully effective. An MDF sheet will be purchased, and plans drawn for the conditioning box.
Back of the envelope calculations tell us that a bottle conditioner for 23 L stored in around 70 330 mL bottles should be around about 550 mm squared internally. The side and top panels will be ~19 mm MDF, with ~8 mm plywood base with holes drilled through it to allow the beers to sit and air to circulate through. We've designed a box shown below:
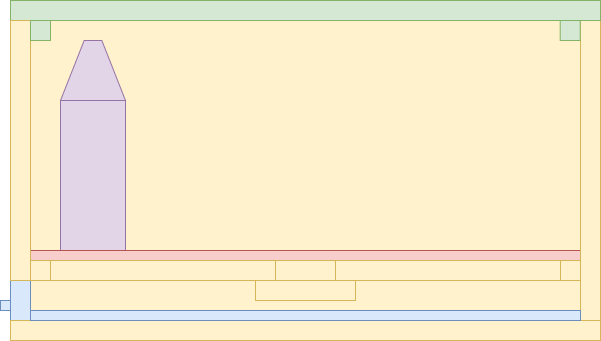
Below is shown the schematic for the electrical system:
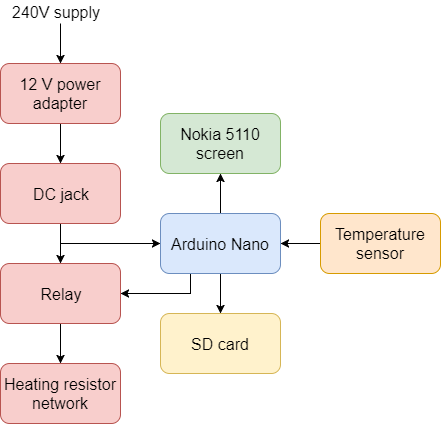
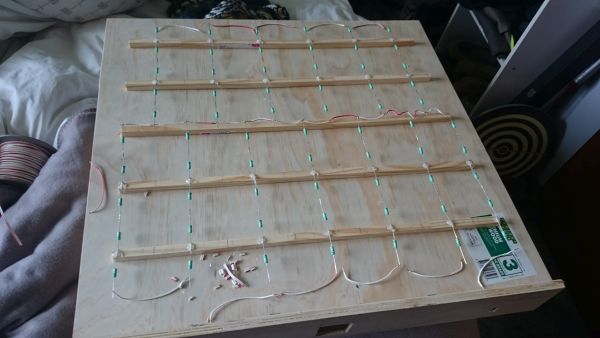
The resistors will be laid out in strips of 5, alternating alighnment so as to provide good heat distribution. The resistors will be slightly vertically raised from the MDF to reduce the probability of fire (although already nearly zero) by strips of wood, and then the resistor network will be glued onto the strips and joined in parallel. In future, an RTC might be included, as well as some kind of user input system, but version 1 only calls for user feedback (to show, at a glance, that the device is working) and data collection (to provide data logging to show that the device works). In practice, the first version will be built on breadboard. A cheap temperature sensor still needs to be chosen and purchased, a method chosen to allow the draw to be removeable while the sensor is connected to the main assembly.
Next actions:
Today, Dad made the new beer conditioner box from the draft design. It's drying up at the moment:
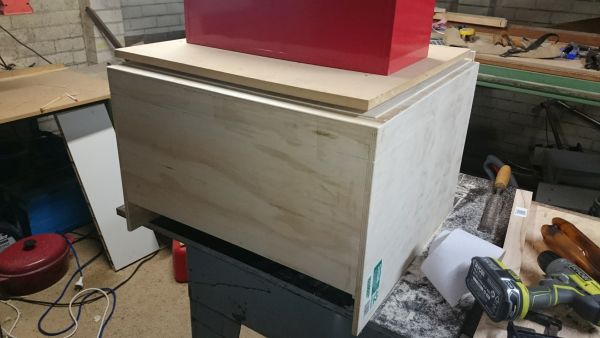
Next, I'll add in the electronic components to form a functional box.
We also bought some carboard boxes to store beer bottles.
Next actions:
I started work on the electrical components of the conditioner. Firstly, I laid out the soldered resistor network (5 in series, 13 lots in parallel). Then I terminated the ends.
I wired up the 5110 screen, including a logic level converter, and a BMP180 being used as a temperature sensor. It works! I did a quick rewrite of the code to let the temperature and heating state be displayed on the screen.
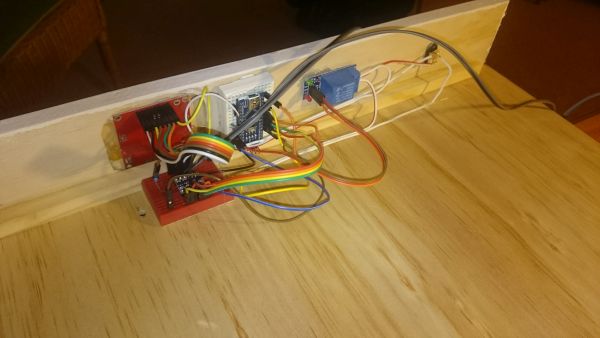
So, this needs to be tidied, and the sensor cable routed. I also need to include min and max data on the screen.
Next actions:
FG of the IPA: 1012. Therefore, the ABV will be around 5.75% inclusing the carbonation drop, making a 330 mL mottle around 1.9 standard drinks. The carboy produced 55 x 330 mL bottles. They were fermented at around 22 C in the new bottle conditioner, and will stay there for 2 weeks.
The bottle conditioner is pretty much finished:
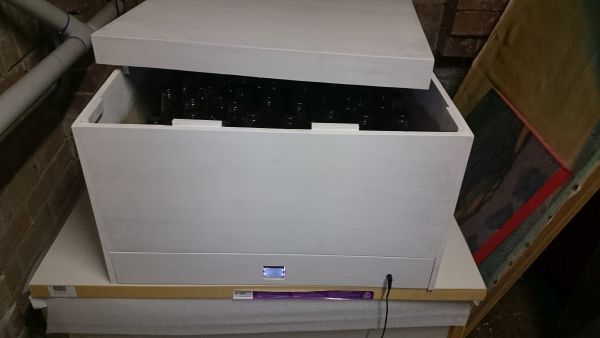
I was reminded once again of the importance of making PCBs, even for simple circuits. It very quickly becomes a mess with breadboards. It seems like the thermal mass of the beer is enough to keep the temperature regulated to within 0.1 C of the required temperature, which is amazing. I'll update the data displayed on the screen in future (currently just the temperature and the heater status), buit it works fine for the moment. Some other lessons learned: Dad is really good at making things, especially when given good instructions; Nokia 5110 screens are great, but still need loic level converters.
Then the dark ale (brew 4) was produced. OG = 1.039. Brewing was done with 1 kg of dextrose, as per the instructions. Fermentation will be done at 22 C again. This will be bottled on 2017-09-30, at the same time as the IPA (brew 3) is removed from the conditioner.
There is a background goal of brewing 100 L of nice beer in time for Christmas. I think this is reasonable and attainable.
The bottling process was fine with the new lever press and the glass bottles. Care needs to be taken to ensure that the bottles are very clean, and it's still very much a 2 person job to bottle.
Next actions:
The bottle conditioner will definitely need some insulation; unfortunately, at the moment, the edges are much cooler than the center. Software changes are not required at this stage.
The FG for the dark ale (brew 4) was taken as 1.004, giving an ABV of around 4.6%, or 1.5 standard drinks. The bottles have been put into storage.
Just finished brewing (brew 5) 54 (I managed to lose some) x 330 mL Cooper's Sparkling Ale with 1.5 kg of Cooper's Light Malt Extract, 500 g of light dry malt and ~300 g of dextrose. OG is 1.057, which is even higher than the IPA, but it is Cooper's Sparkling, so I guess that's fine. Brewing took 2.5 hours single handedly including a shopping trip. I accidently forgot to turn on the fermenter heater though (!!!) so the water has gotten a little chilly. I hope that it can hea tup enough to begin fermentation soon. A colossal oversight.
The beer labels are becoming more and more necessary. I'm going to install some software to help me design it, and start from there.
Next actions:
Bottled and brewed in around 3 hours. This is quickly becoming an operation.
FG of 55 x 330 mL bottles of Sparkling Ale = 1.014: ABV = 5.5%. OG of Mosaic Pale Ale (brew 6) is 1.041. The malt extract looked a little chunky, I'm guessing there will be extra sediment this time around.
Bottle storage is starting to become a problem. The boxes store 28 x 330 mL snugly, but they are unweildy. Stackable wooden boxes with deividers will be necessary in the future.
I also bought around 120 long neck bottles, brown, for $60. They are a little dirty, but they should complete our home brewing collection. This, along with a couple of bottle brushes, has hopefully completed our kit.
Beer brewing cost breakdown:
Fixed costs:
| Item | Cost ($AUD) |
|---|---|
| Carboy | 35.00? |
| Stirring spoon | 5.00? |
| Air lock | 5.00? |
| Tap | 5.00? |
| Total | 50? |
Operational costs (per bottle):
| Item | Cost ($AUD) |
|---|---|
| Malt extract | 0.34-0.47 |
| Sugar | 0.08-0.39 |
| Carbonation drops | 0.06 |
| Sanitiser | ~0 |
| Cap | 0.05 |
| Bottle | 0.80 |
| Total (without bottle) | 0.52-0.97 |
| Total (with bottle) | 1.32-1.77 |
I also found a wonderful resource at howtobrew.com which seems to be a definitive guide for all things brewing. Really glad to have found it, and it would have been amazing to find it sooner.
Next actions:
IPA OG = 1.050. With 1.5 kg of light dry malt and 25 g of Moasaic hops, strained.
English Bitter (brew 9) OG = 1.034 with 0.5 kg of light dry malt and 50 g of Gold Loom hops, strained.
We put on a new brew of Amber Ale a few days ago (I need to check with Robert) and it had an OG of around 1.046. We used 1 kg of body blend and some Cascade hops.
Amber Ale (brew 10) FG = 1.012. Without being certain of the OG, it's hard to say what the ABV is, but we will assume approx 4.5%. We broke one bottle after out capper broke, looking to get it repaired or replaced. The beer labels look good, we'll apply them when the beer is conditioned.
IPA (brew 11) OG = 1.058 with 1.5 kg of light dry malt and 37.5 g of strained Mosaic hops.
Adjusted the beer conditioner to actually condition at 22 C, as measured by my digital thermometer.
We've decided to make ou next beer with grain. The thermometer will have hopefully arrived by then, and the only other tool we need is a strainer.
Next actions: